

Master Bathroom Makeover

It all started with a comment my husband made a few weeks ago. We have been in our home for over three years and have put our own touch on every room in the house. Whether it’s painting, replacing light fixtures, staining the floors, or just decorating - every room feels like OURS.
Well…every room except the master bathroom. Then one day my husband said something along the lines of “You’ve completely given up on our bathroom. There have been paint samples on the wall for two years. The towels don’t match. You even keep this broken trash can with a missing lid.” He thought it was hilarious that I care about literally ever other detail of our home - down to the light switch plates - but I had completely given up on this space.
Why was that? Well, to start, I didn’t like much about the bathroom. I wanted to replace the shower tile, the floor tiling, the vanity, the light fixtures, the paint was too tan, the window treatments were wrong….etc. etc. I kept thinking about the master bathroom as a huge project that I needed to wait to tackle. The problem was, I didn’t want to allocate the money it would take to do a whole bathroom renovation (somewhere between $5,000 - $10,000 if we did it right). So there it sat. Because I couldn’t do it ALL I just didn’t do ANYTHING. (Feeling like this is a metaphor for procrastinators everywhere, but I digress!)
It took me three years, but I finally realized just how stupid that logic was! With just a little effort, a few changes, a couple coats of paint, I could have been enjoying that space just like the rest of our home. I could have been proud to show it to my friends instead of begging them to use the upstairs bathroom. I could have fixed most of the problems with just a little elbow grease.
So that’s what I did. Finally. Our master bathroom makeover. Not a renovation. Not a remodel. But a budget-friendly, should-have-done-it-sooner, good-ole makeover.
But first, let’s see the BEFORE pictures.
BEFORE PHOTOS
I want to preface this with saying: the bathroom was fine! It just wasn’t our style. It didn’t flow with the cool tones we have in the rest of the house. And I just didn’t love it. Here were the things I set out to fix:
Lighten up the wall color - our master suite is in the basement (really, the “down” of our duplex down) so it doesn’t get much natural light. The tan paint and tan tiles weren’t doing it any favors. I decided I didn’t have the budget to change the tiles (at least not right away) but I could definitely change the paint!
Update the fixtures - the fixtures were either oil rubbed bronze or nickel. For us, that just didn’t work with the color tones we have going on in the rest of our home. I lean towards black fixtures or mixing metals.
Update light sconces - the light sconces were never my favorite. But they do provide a majority of the light in the room, so I did a lot of research on what type of lights are best for bathroom vanities.
Update the vanity & mirror - The mirror always felt small in the big bathroom. We have tall ceilings, so I looked for something a bit taller. I also didn’t love the red wood tone of the vanity/mirror combo.
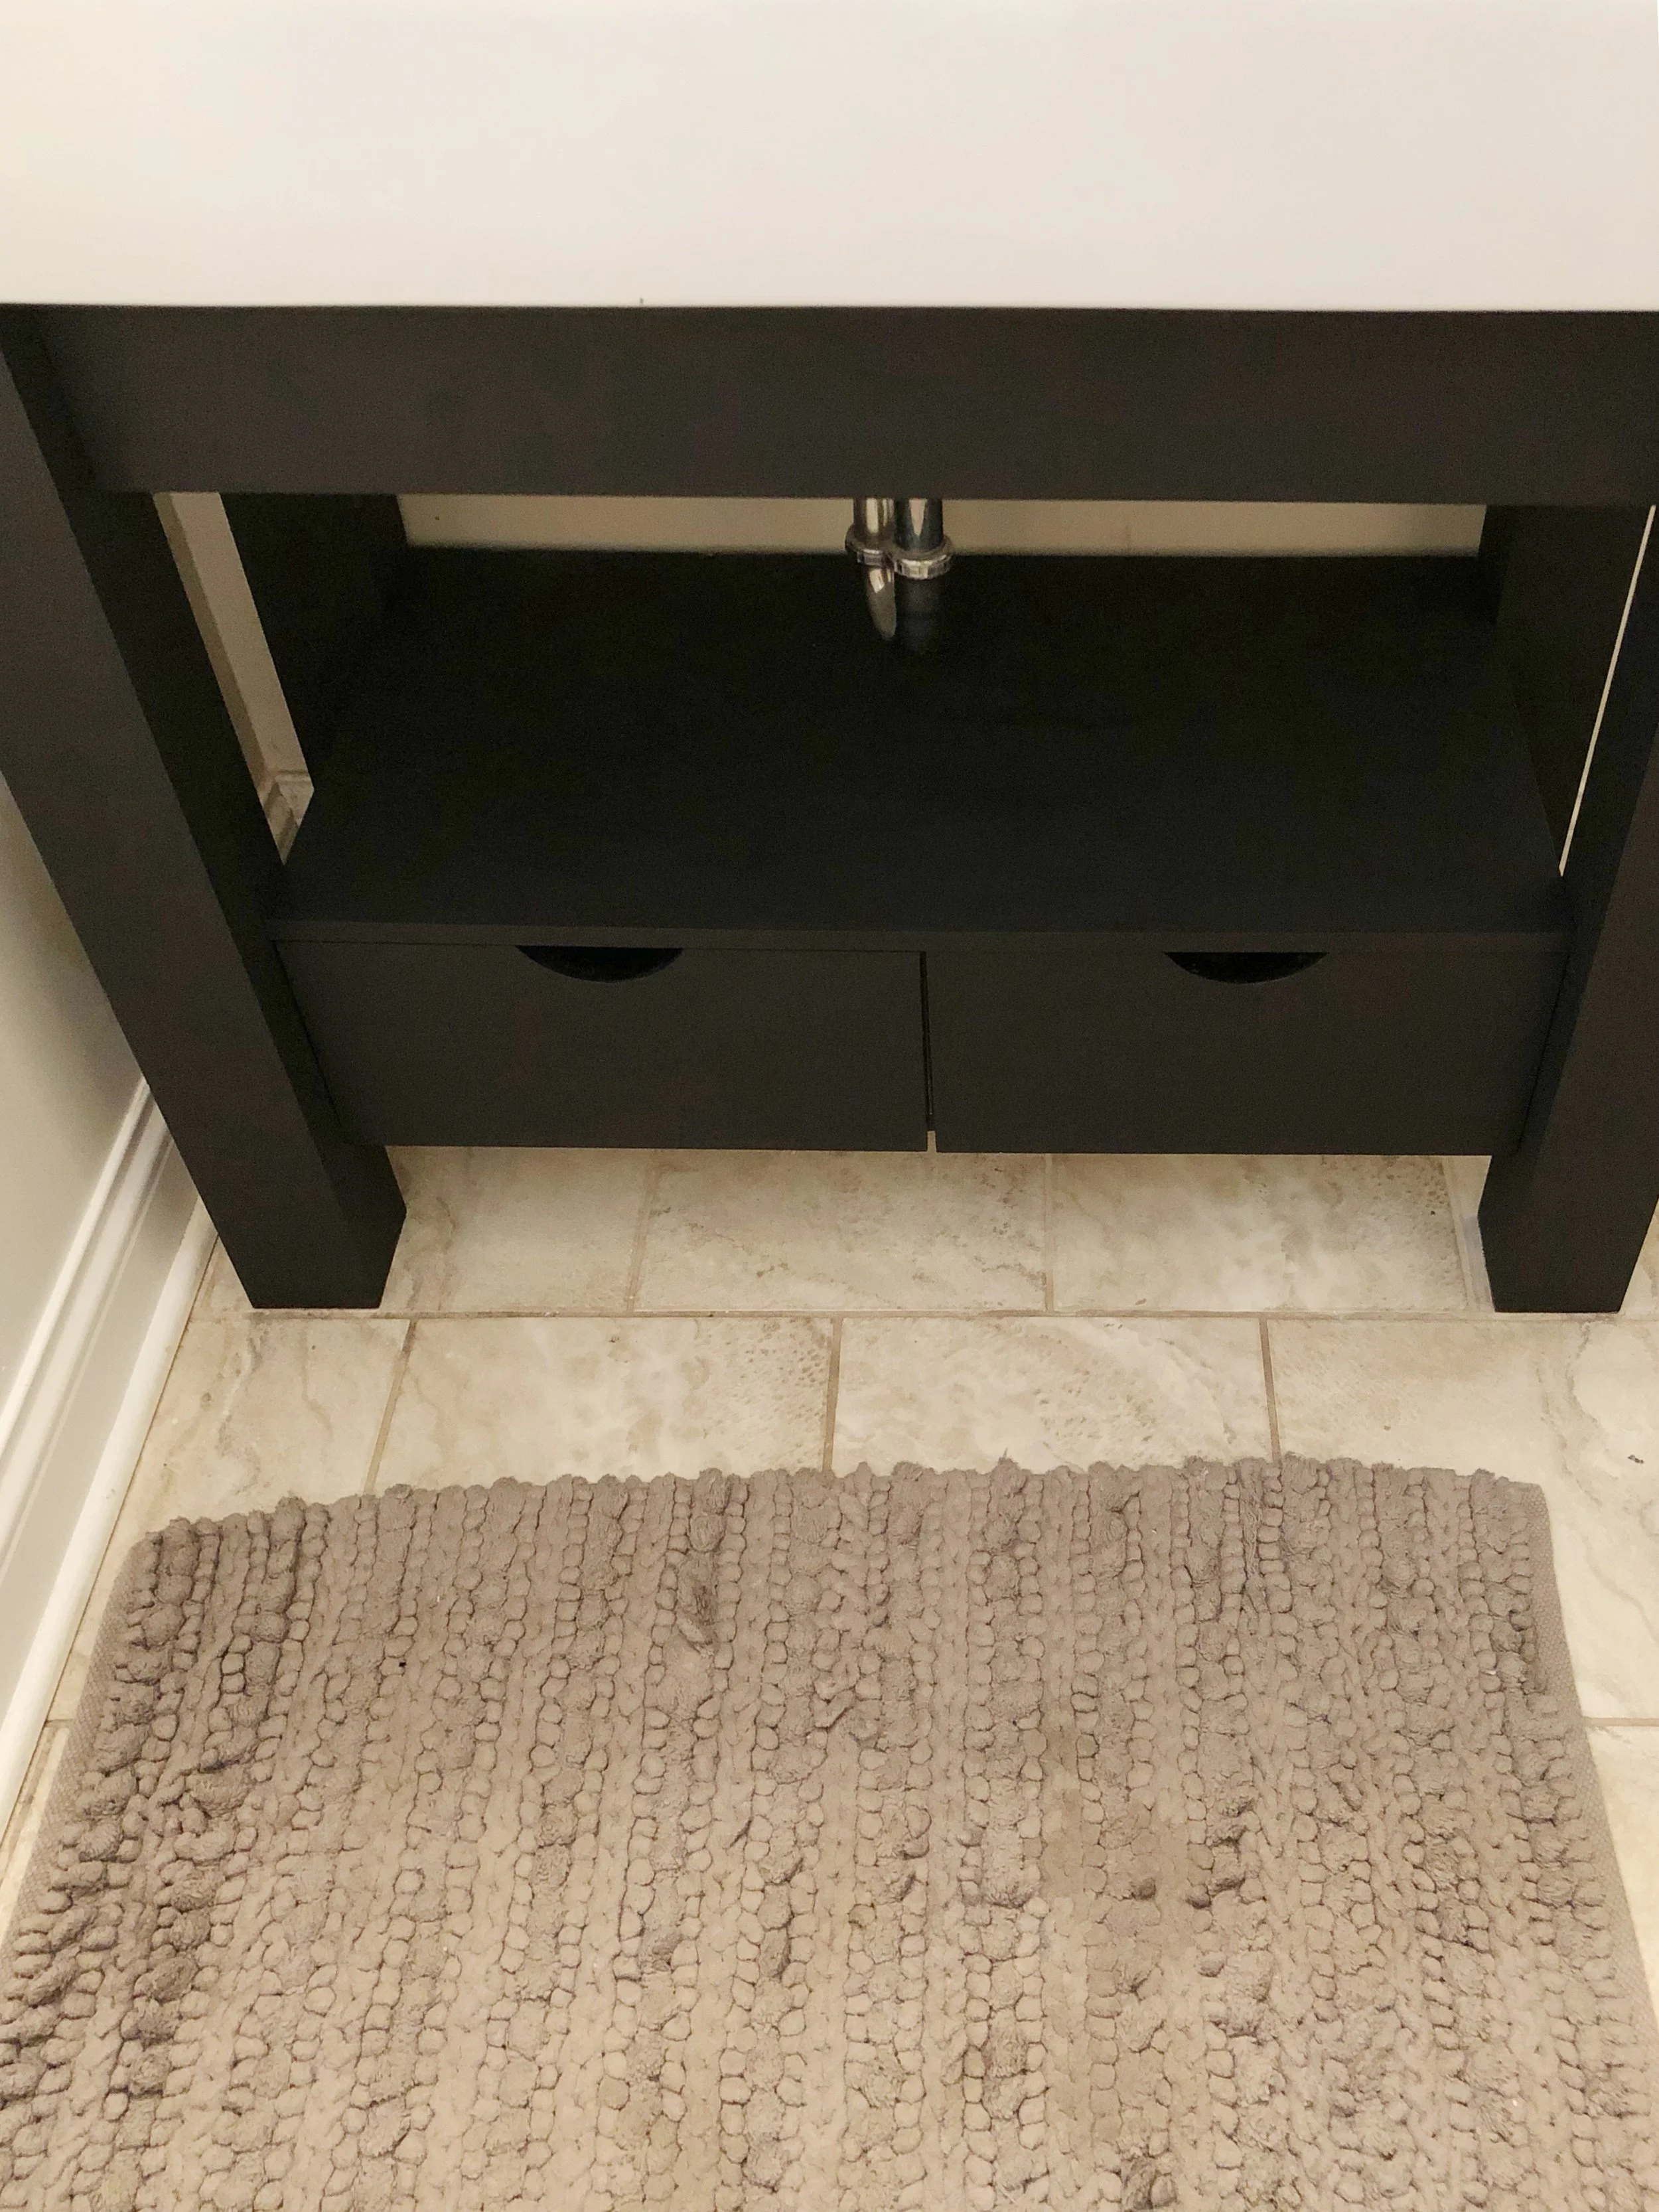
Storage solutions - We have zero hidden storage in the bathroom. The vanity has this open shelf, which never felt functional. There are also wire shelves next to the shower, which always felt like it should have a door to hide all of the unsightly bathroom things like dental floss, tanning spray, medicine, the list goes on. We needed some covered storage.

Original vanity & mirror combo. Plus broken trash can with no lid :)

Really just let the tan tile sink in here. Tan tile + tan paint color just felt a bit much for me.
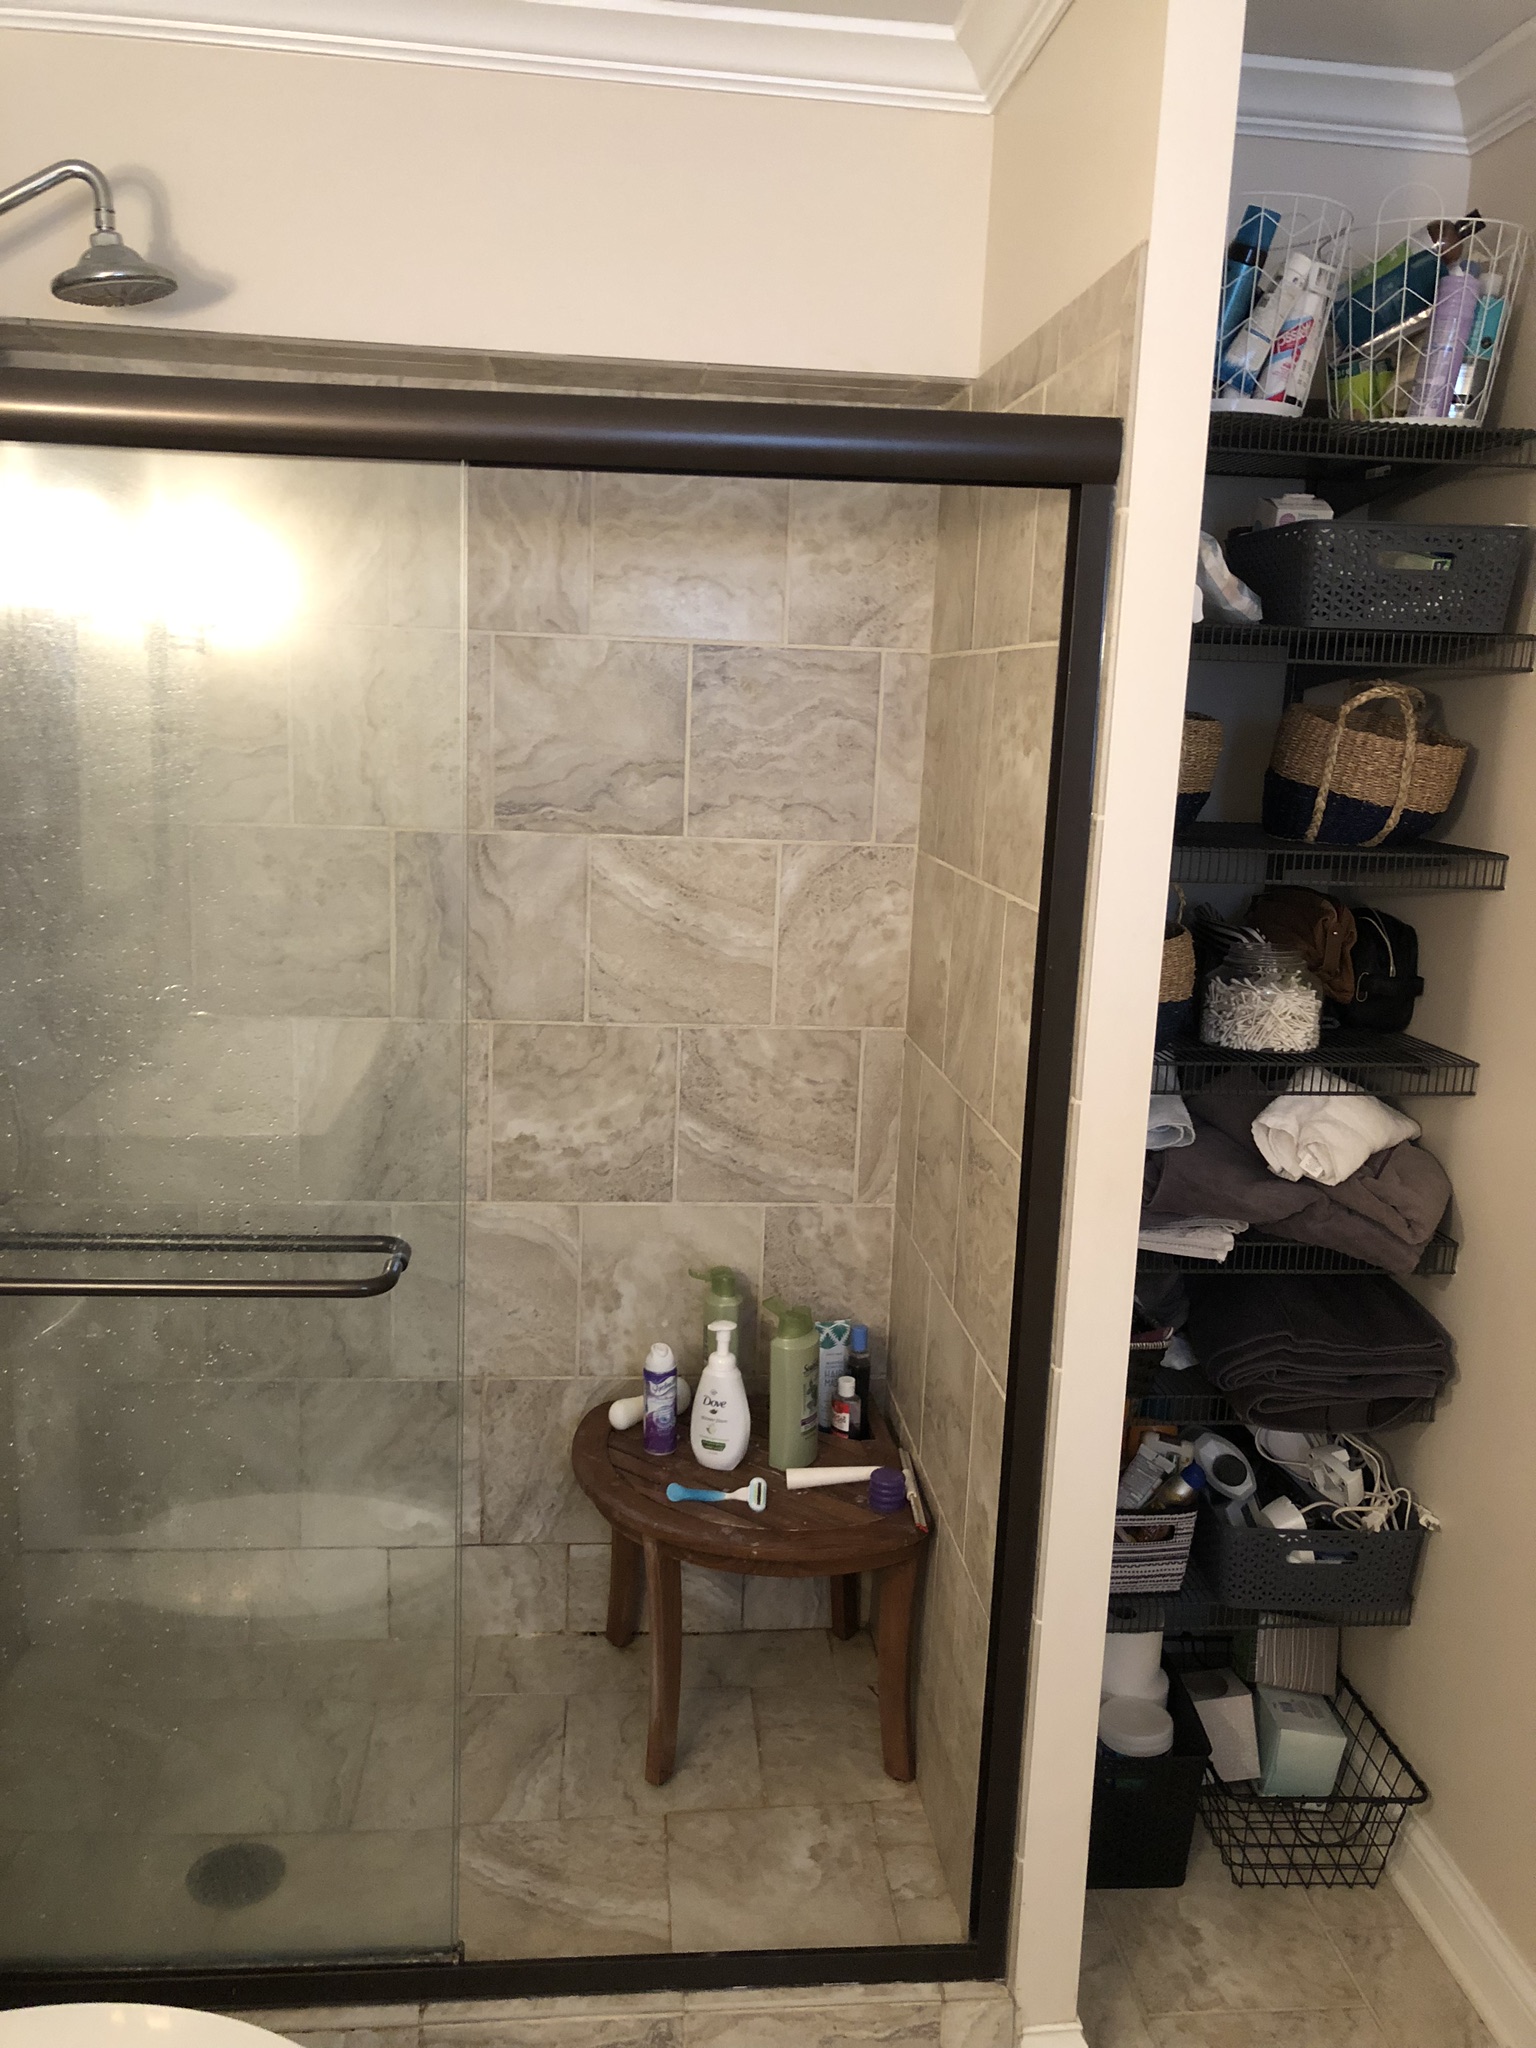
These are the open shevles which are not that practical because 1) things fall through the wire and 2) you want to HIDE all of your bathroom essentials, not put it all on display.
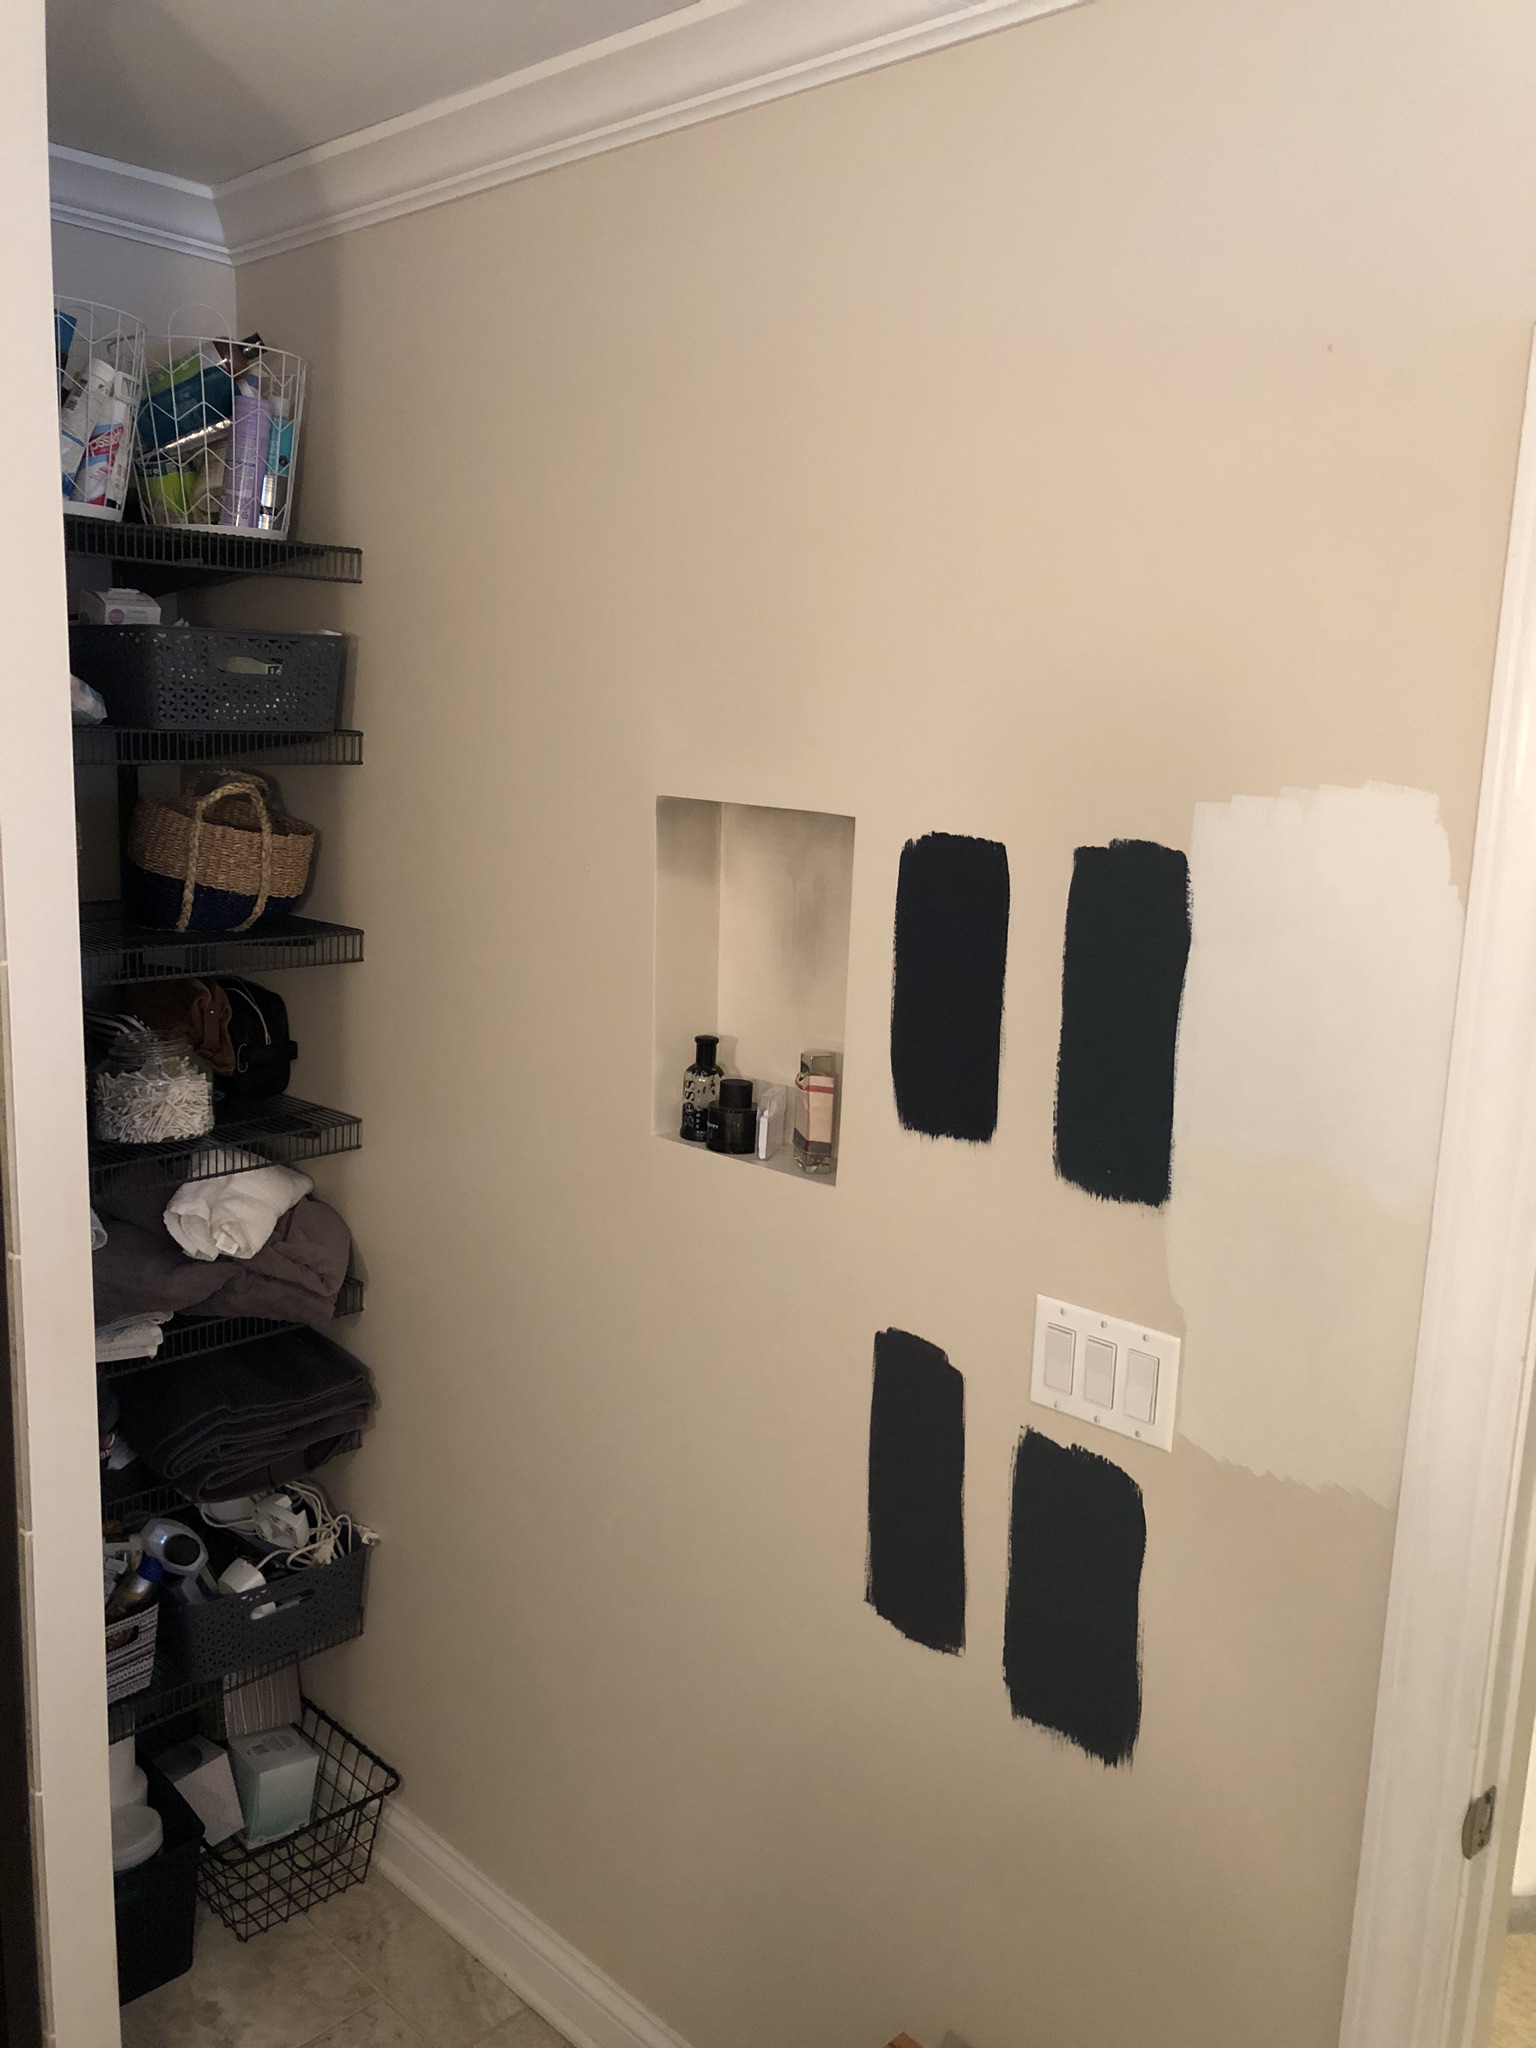
Here are the paint samples I tested almost two years ago! When we painted our upstairs bathroom, I thought I might be resourceful with the dark paint in here too, but it was just too dark in the basement. We ultimately used the same white paint color we used for the nursery.

And finally, the window cut-out with blinds that just doesn’t work. We have some ideas…
Ok, so moving on to what I finally did to update the bathroom - yay! This whole project took a few days. But I think you could accomplish something like this in 1 weekend. Since I am home with a baby, I had to work during nap time which made it drag out a bit more. First, I tackled painting the room!
WALL PAINT
Lucky for me, I had leftover paint from our nursery project. We used Behr Marquee Ultra Pure White. I love the bright white color in the bathroom, especially with the limited natural light we get in there.
I also really love this paint can topper with the pour spout. It makes clean up SO easy. I clearly let the paint dribble onto the lid here, but it helps prevent spills while you are working and makes pouring the paint SO much easier. When you’re done painting for the day or even if you’ve finished the project but want to use the paint later - you can store the paint just like this! So convenient.

We used Behr Marquee Ultra Pure White paint color on our bathroom walls & in our nursery.


Trimming the walls. We also need to caulk the ceiling, but that’s a project for another day!
VANITY PAINT
For the vanity paint, I used a black chalk paint that I had leftover from our wet bar project. We used Valspar Chalky Finish Deep Base paint in black. I know it will hold up on the vanity because we painted the bar with it about two years ago and it has held up great! I got this paint at Lowe’s or Home Depot, but found similar chalk paint on Amazon. If you’re ordering online, just be careful to get chalk paint - not chalkboard paint :)
The best part about chalk paint is that you don’t really have to do much prep to the surfaces. For the vanity I just wiped it down with a wet paper towel to get rid of any dust and residue. THAT’S IT! I know that some folks might prep the wood a bit more or put a top coat on, but I just opt for the easy way and it’s worked fine! I did one coat of this paint, let it dry, then touched up any areas that needed it.

Valspar Chalky Finish Deep Base paint we used, in black.

Our vanity, halfway painted with the chalk paint!
The vanity done!
MIRROR
Instead of painting the vanity mirror black, like the vanity, I wanted to try to find a more unique mirror. I also noticed our current mirror was small, boxy, and just didn’t add much design to the room. So I headed to Target (of course!) and found this gorgeous mirror for $70! I love that it’s a bit taller than the original mirror, since there are tall ceilings in the bathroom. I also love the wood tone mixed with the black.
There is a better picture of the mirror where I talk about sconces below.
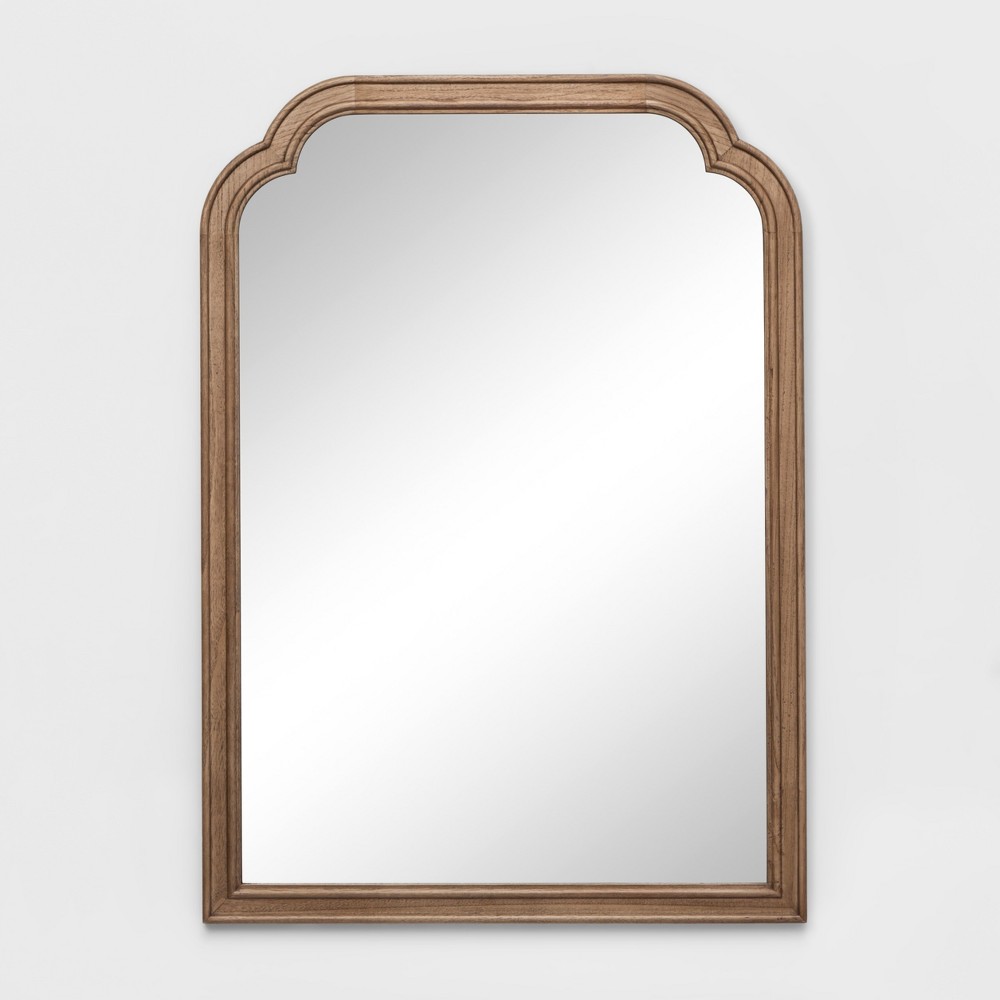

Testing out the Target mirror - love how tall it is!
LIGHT SCONCES
I found a TON of sconces that I liked on Amazon. But these were my two favorites, so I ordered both to hang them up and decide. I thought I might like the plain black scones on the left, since they were a bit more classic and kept with a minimalist theme. But once we held up the black & brass combination, I knew it would just add an extra element of interest to the room. Especially with white walls and a neutral mirror, the scones could be a bit more fun! Plus, can you believe they were only $39 each! I really like both options, though, and linked them both below.

I love the class black sconce on the left. But the brass and black combo is exactly what the bathroom needed to add some interest.


Up close, how the sconces look now hung!
SHELVING
We (I) hated the open, wire shelving in the corner of the bathroom next to the shower. It just displayed all of our extra toiletries, towels, and things that tend to get messy. I was on a mission to find a cabinet that exactly fit that narrow spot. And I found one from Birch Lane. Here is the link to the Scholl Storage Cabinet, we got it in black. It is amazing how much the cabinet makes a difference. The whole space feels more organized.
Speaking of organized, I bought a bunch of acrylic bins and plan to organize this cabinet soon!

The Scholl cabinet from Birch Lane fit our narrow space perfectly.
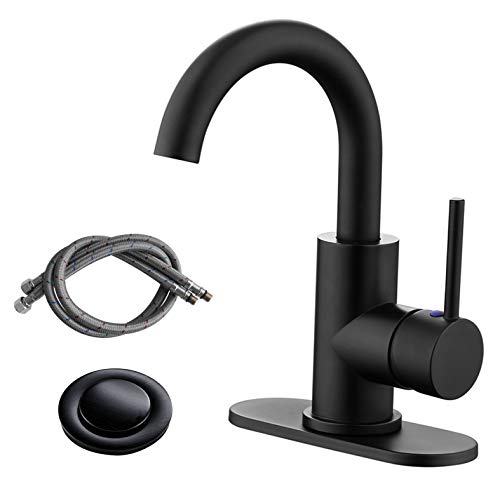
HARDWARE / FAUCET / TRASH CAN
The hardware needed updating. From the sink faucet, to the towel hook, to the toilet paper holder, and the trash can - we updated all of them to matte black. Here are the links to what we chose.


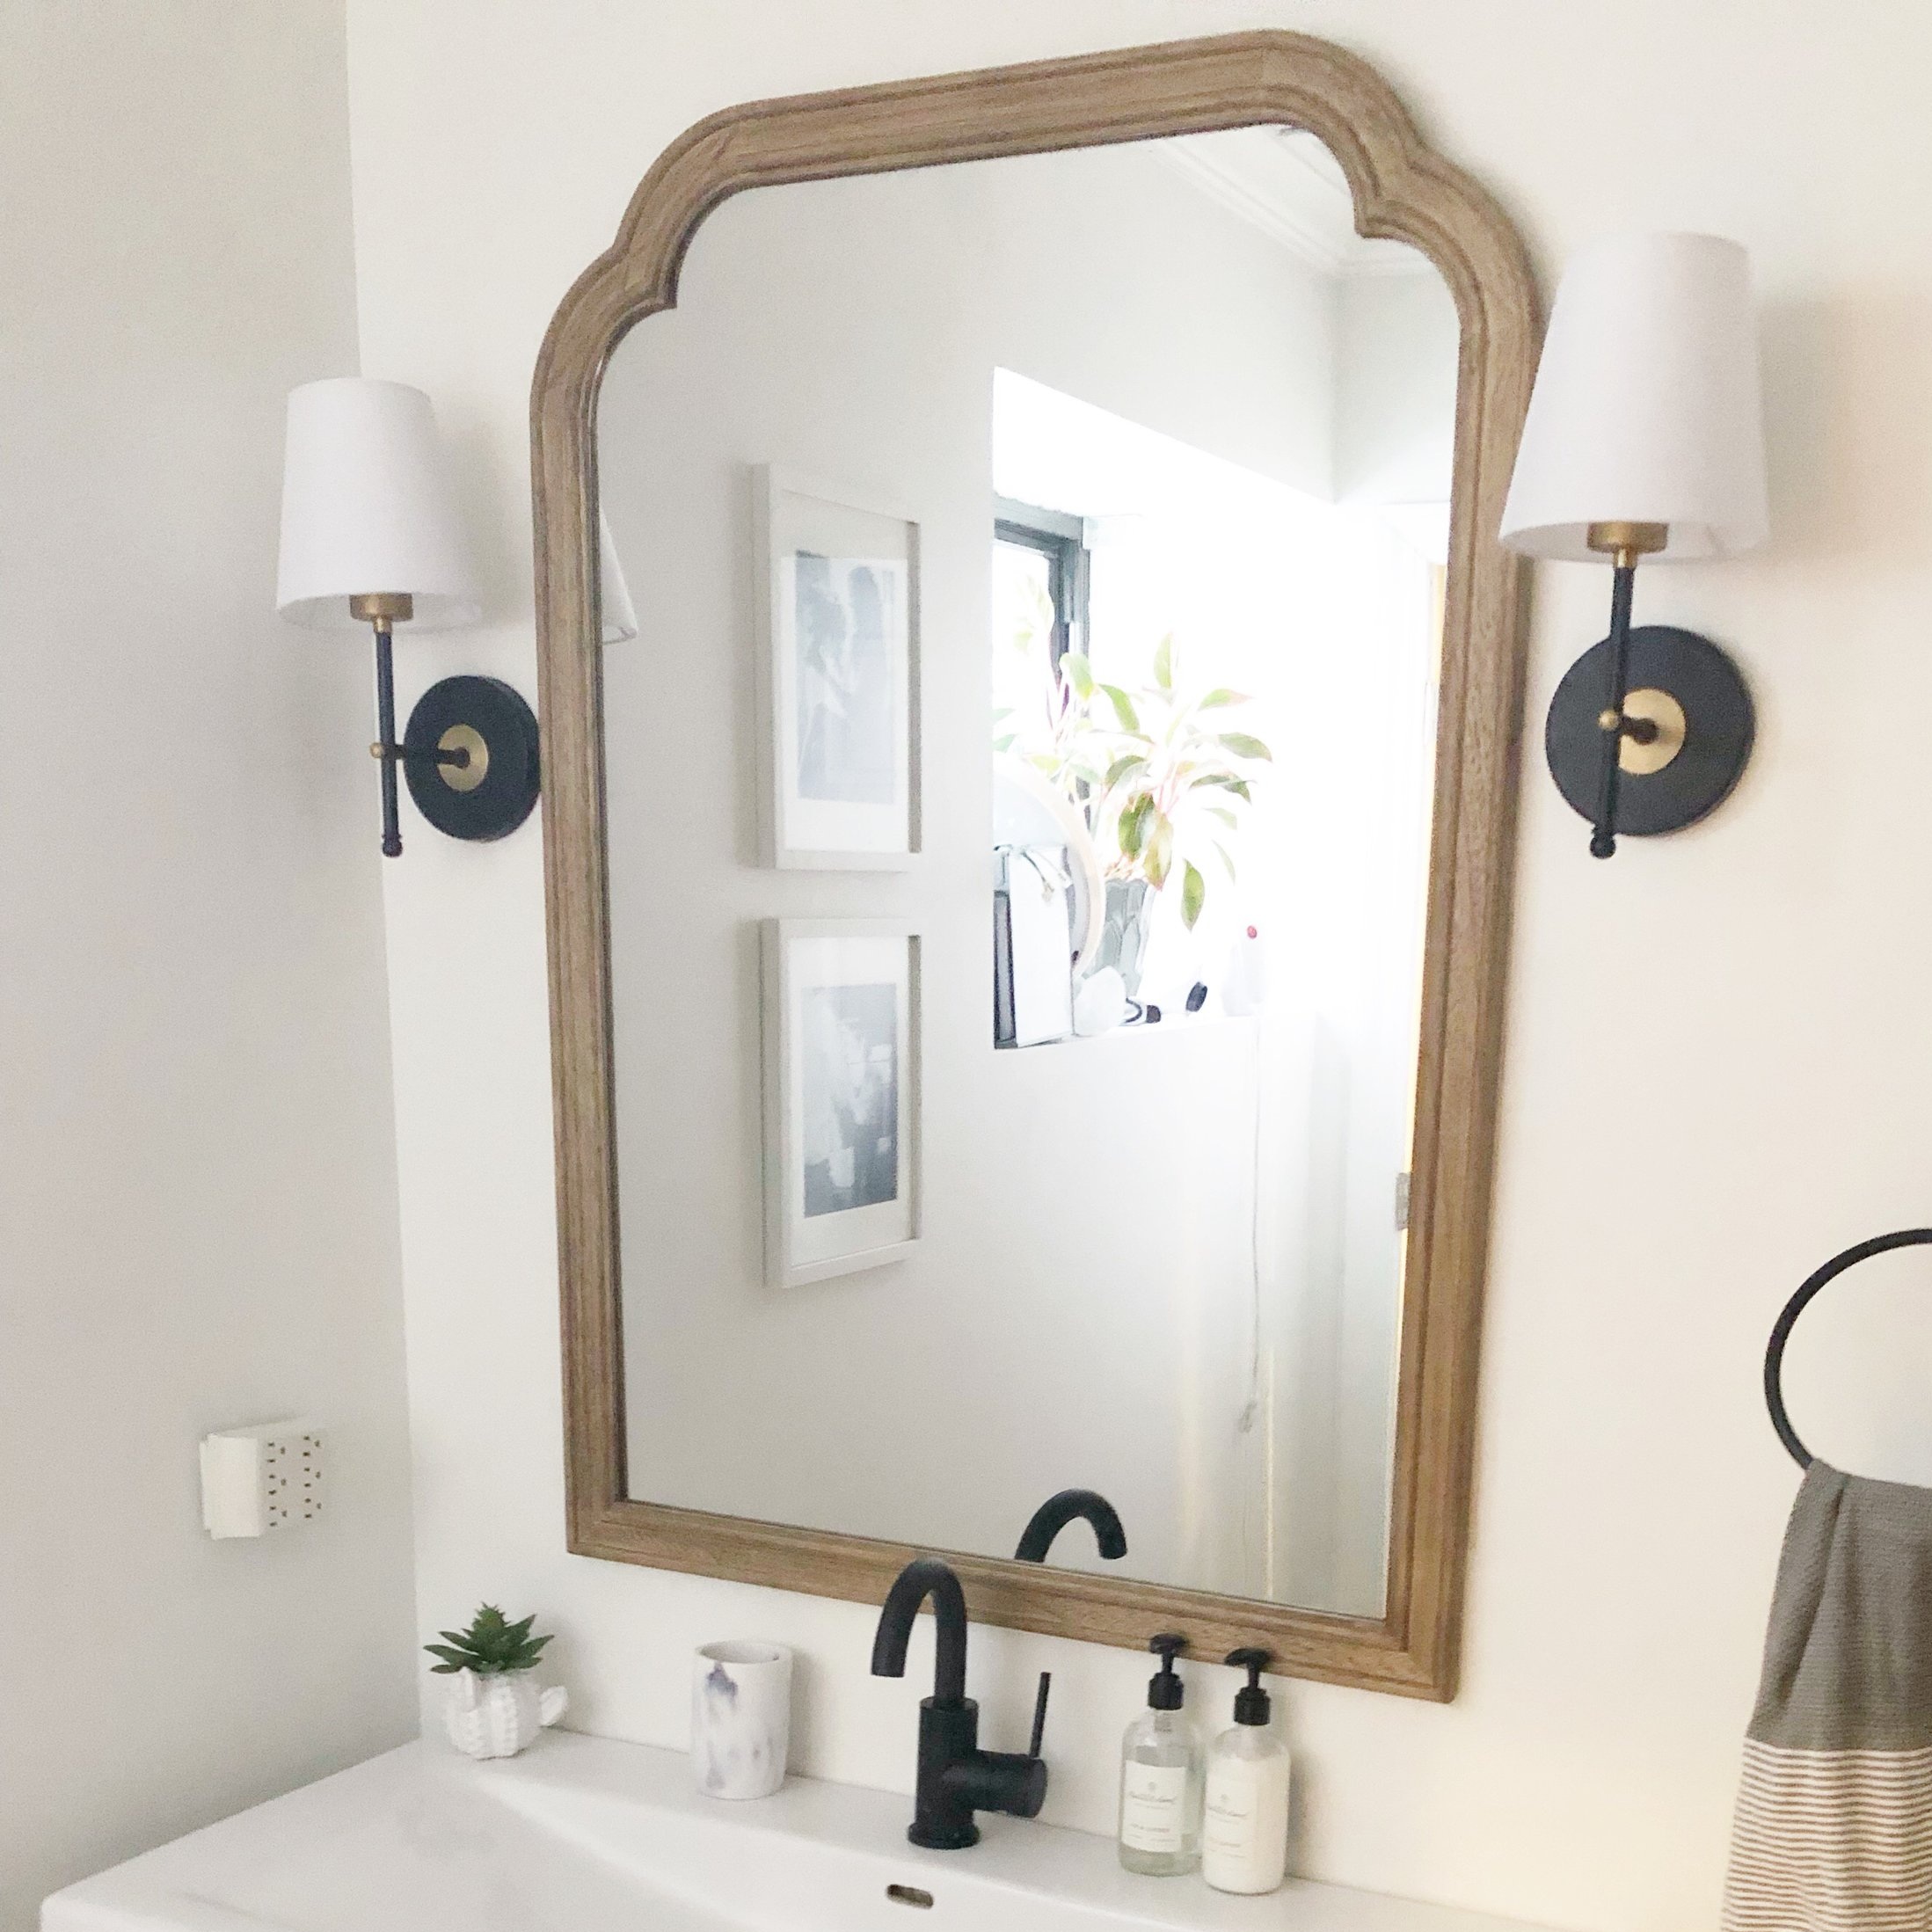
AFTER PHOTOS
I am really happy with the way it turned out! It’s amazing what some paint and a few hardware updates can do. And to think, I waited so long. Why?! It’s so nice using this bathroom every morning and evening now. There are a few final touches we need to make (like updating the sink drain and the toilet handle), but for now, I am enjoying the refreshed look. Check it out…

I really love the mirror / sconce combination.

Here, with the sconces on. They give off a lot of light and I love getting ready for bed now! It’s so relaxing.

We added some plants along the windowsill. We plan to add fogged paper to the windows, to let the natural light in while keeping some privacy.
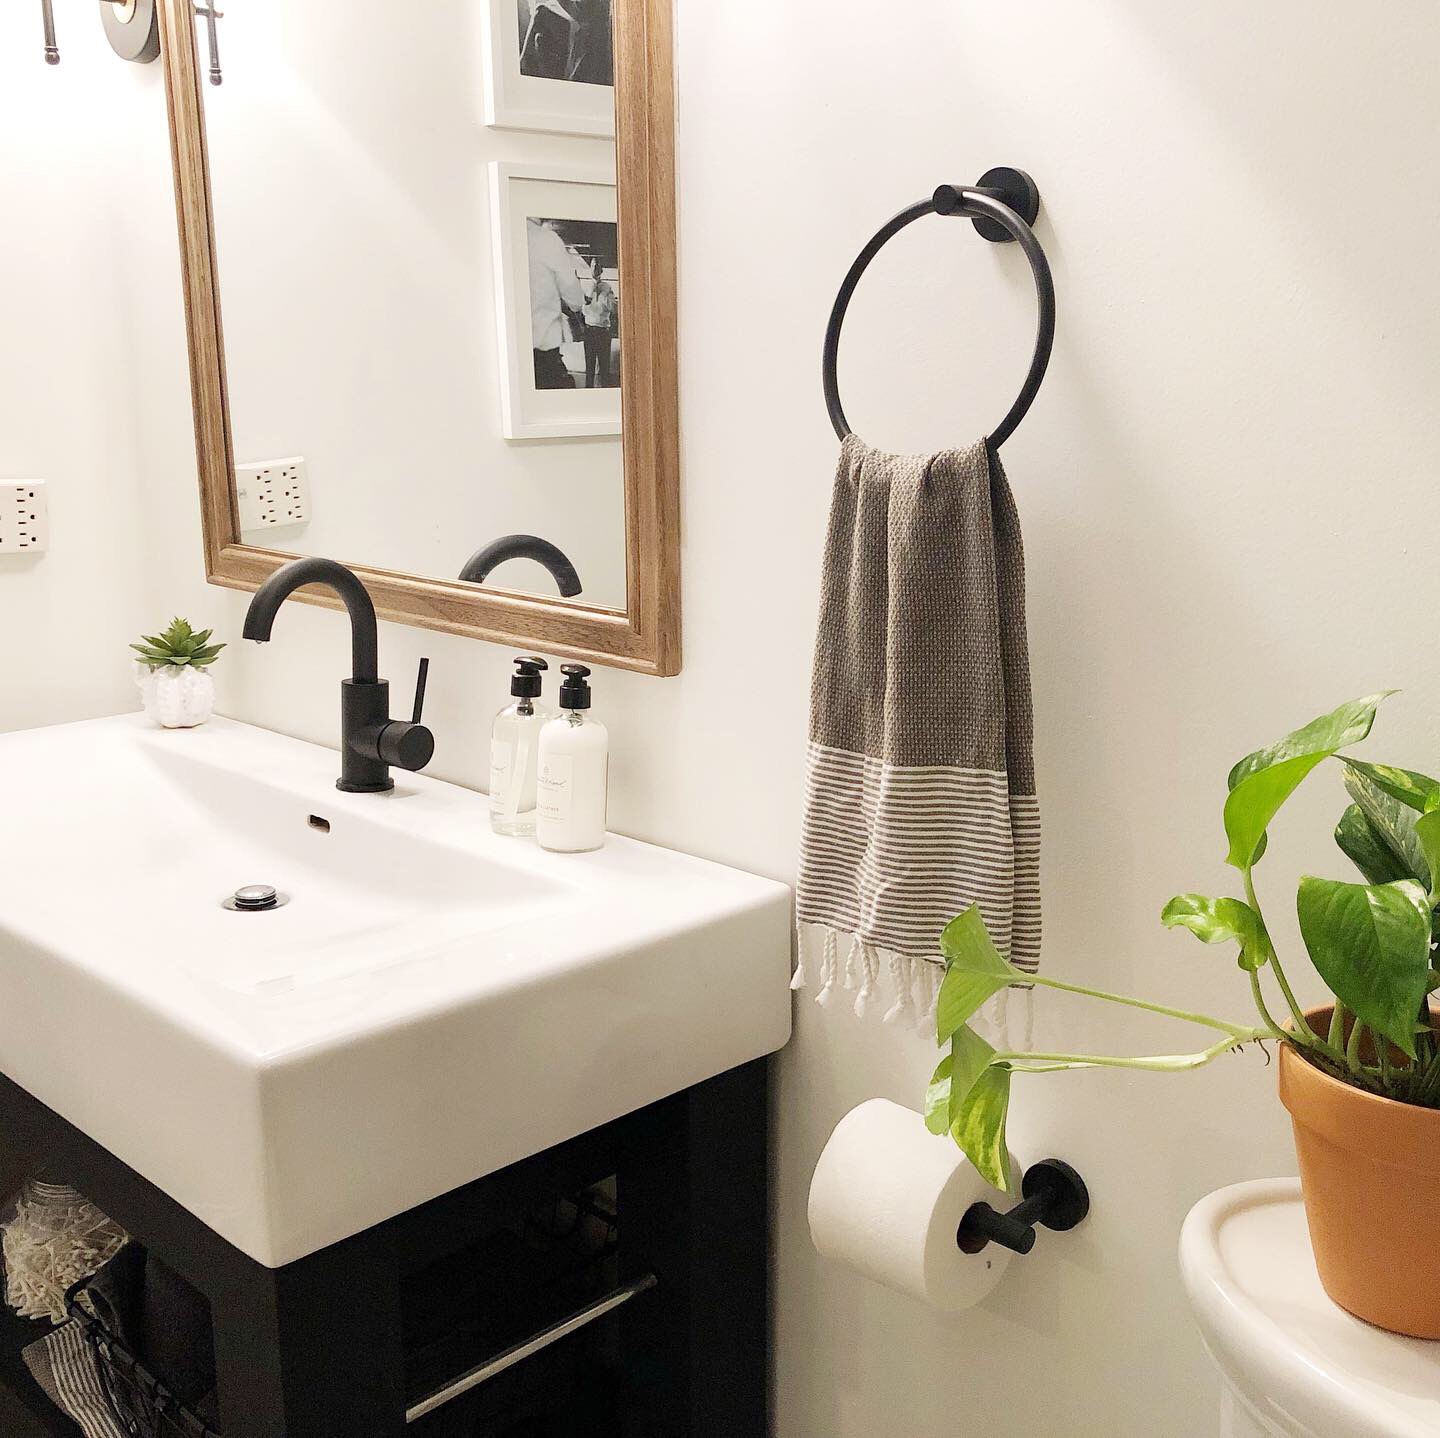
The black hardware and some greenery really makes a difference!
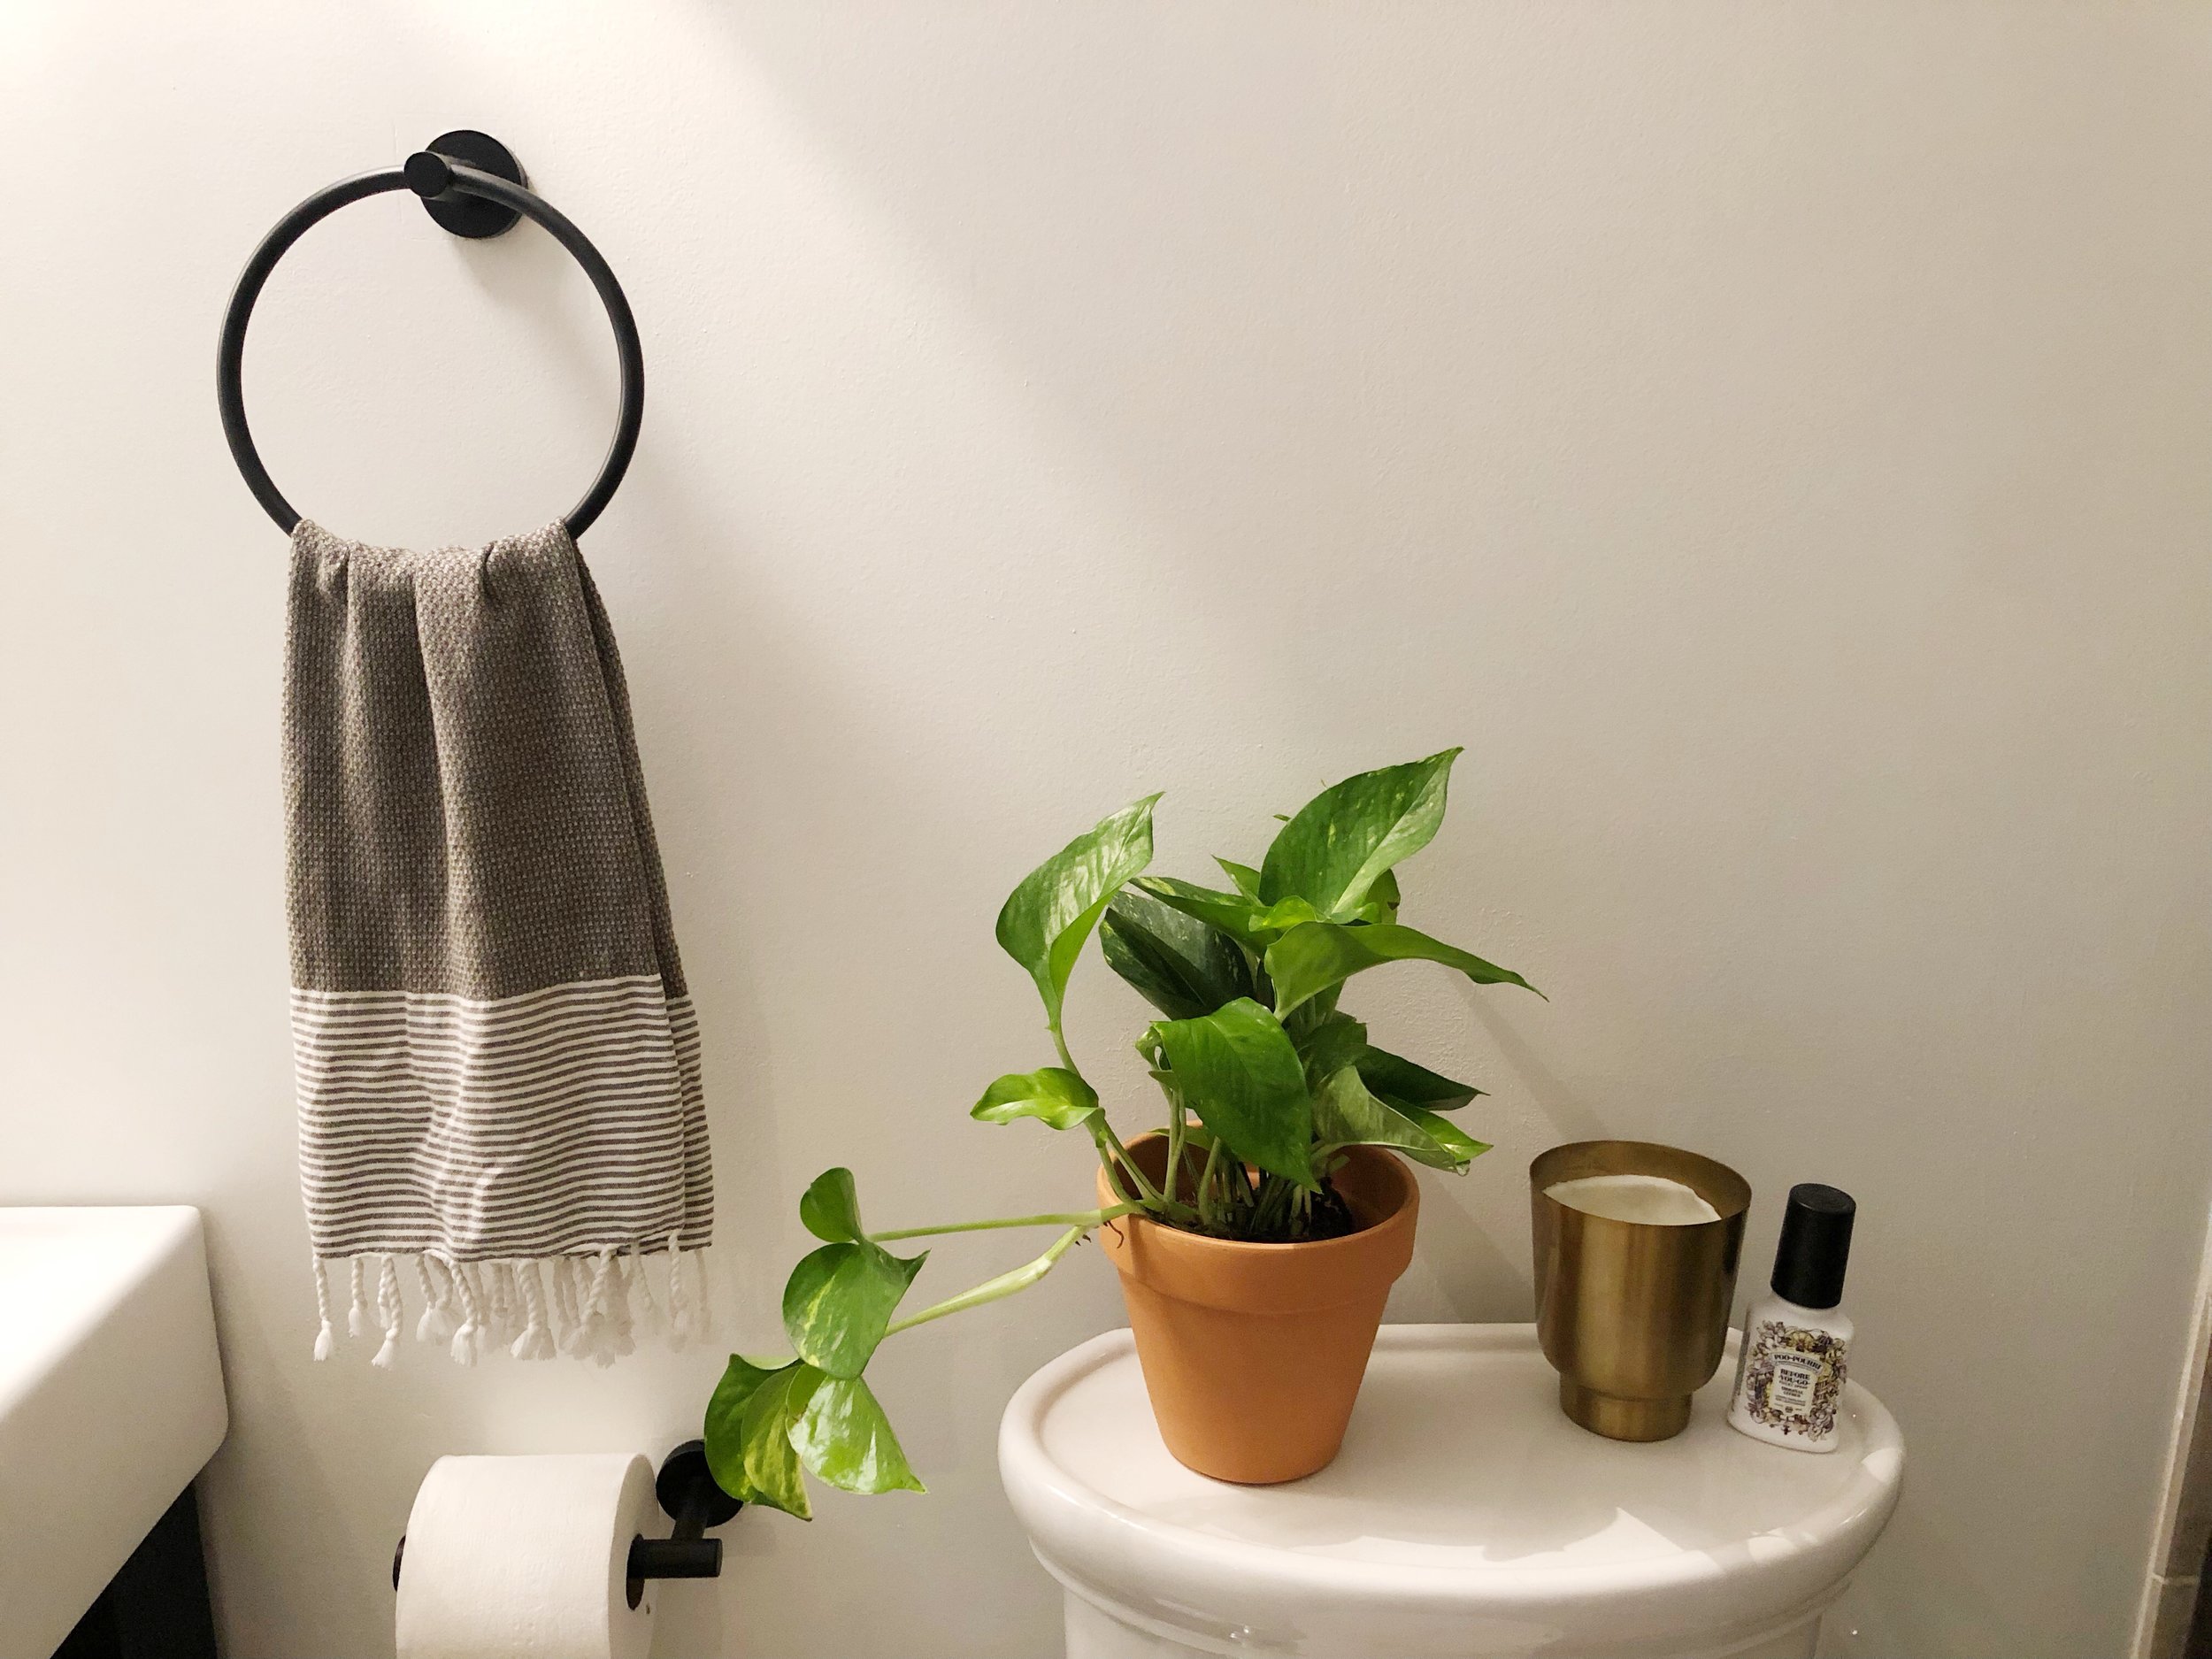
Who would’ve thought the top of our toilet could be so cute! :)

The Scholl cabinet next to the shower really helps hide the unsightly bathroom things. I also hung fresh white towels on the built-in towel rod. I thought, since we have glass doors, this helps to cover up our shampoo / body wash situation inside the shower.
And that’s it! I am sure we will do a few more things to the bathroom along the way. As I mentioned, we want to replace the toilet handle, the sink drain, maybe even the exposed plumbing to all be matte black. I’ve also been reading some blogs about painting shower tiles…but who knows! For now, I am happy with how it all turned out.


